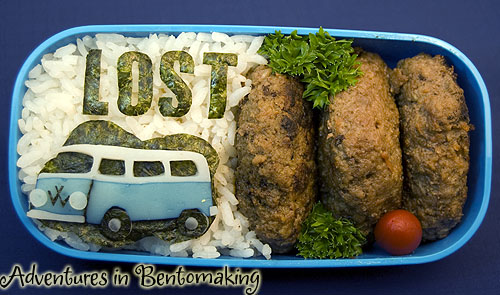
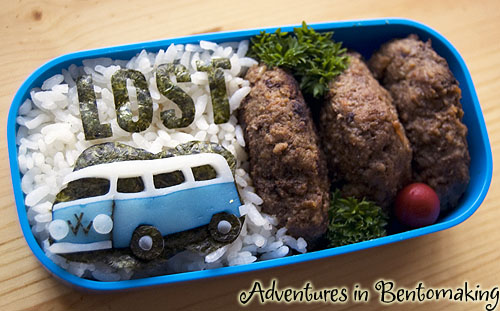
Dharma Van Bento (Lost Bento 8)
After the really strange and rather goofy looking rice statue last week (my brother called it a “monstrosity” and suggested I re-do it another time, lol), I’m pretty happy with how this week’s bento came out. This one is a suggestion by my co-worker, the Bat Pat. Many thanks to him!

The only thing I’m not happy about with this one is the darned VW logo I put on the front. I used a photo of the van they use, but it was an off-set photo and apparently on the show they replace the VW with a Dharma logo. Oh well… This was actually the second van I made. The first was much larger, done by eye, and made in sections. To put it bluntly, it sucked, so this morning I started over again.
Once again, the lighting in my lightbox is really not working well for my new Nikon. I had to do a lot of Photoshopping on the lighting and color balance for this. I tried taking another picture in the light coming into the kids’ room, but that didn’t really do too much either.

While the rice certainly came out whiter, I’m not that big a fan of this since the light shines off the nori. I’ll definitely keep trying though and hopefully eventually I’ll get it right.
I put the bento together first, which was really easy. I simply put the rice in, flattened it out, pushed it to the side, and then tucked in the three pieces of teriyaki hamburger patties. To fill the holes I put two pieces of parsley and an ume.
The van is made out of kamaboko and I used almost an entire block experimenting, cutting, and other things. As I mentioned, I scrapped my earlier van and it’s a good thing because it was huge. I found a photo of the van and reduced the size and printed it, cut it out, and laid it on top a thin slice of kamaboko. Using an X-Acto knife, I cut around the print-out. After I’d cut out the whole van shape, I cut the top, front bumper, and rear bumper off while I dunked the bottom part of the van in food coloring. To get this color I diluted 1 drop of blue food coloring in about a teaspoon of water.
While that soaked, I cut out the windows of the van and the tires. I put the tire piece on top of nori and cut around it to cover the nori. Using a small coffee straw, I cut out two circles of kamaboko for the center of the tires. I used a regular straw to cut out the headlights and cut the VW by hand with my micro tip scissors. Since the top of the van is white, I needed a dark background before putting it on the rice, so I cut a little nori cloud out and laid it on top. That ended up working really well because it was a nice flat surface to keep the van as a whole on. I dried off the blue piece and connected it with the white top. I cut a little slit in the blue piece and inserted a small strip of nori to show the perspective of the van.
Last of all, I added the bumper, headlights, VW, and rear bumper. I cut out my usual LOST letters and added it to the top portion of the rice above the van. I have a separate layer with broccoli and strawberries that I didn’t photo since it didn’t have any Lost elements in it.
Here’s a sneak peek of tonight’s episode. Don’t watch if you’re not caught up!!
Tags: Bento, LOST Bento, teriyaki hamburger

