

Tutorial: Halloween Cuties With Painted Cheese Part 1
Today I’m going to be going over a couple of cute Halloween characters you can make with painted cheese. I tried to make these as simply as possible to reduce the amount of tools needed. If you don’t have them, these are essential tools that I feel can be used over and over, and you’ll get more use out of them than oodles of molds and cutters.
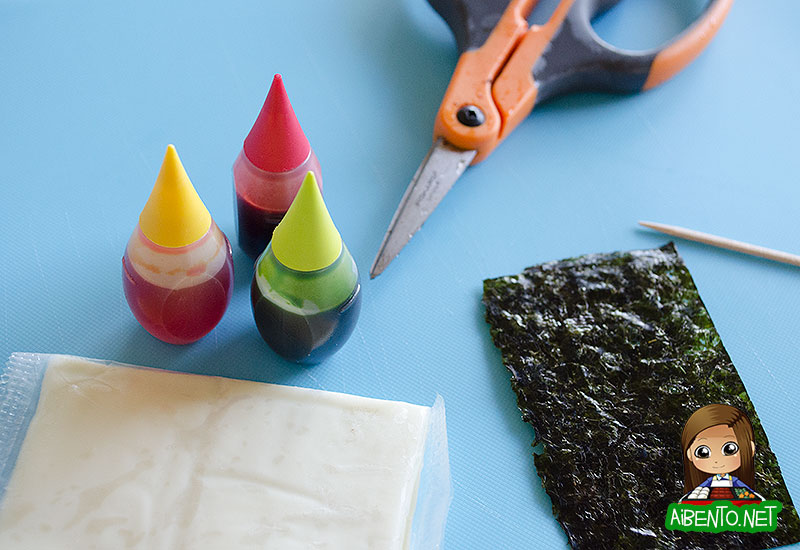
Things you will need:
- Swiss cheese slice
- Small piece of nori
- Scissors (I recommend Fiskars micro-tip)
- Food coloring (I used neon green, red, yellow)
- Toothpicks (pointed or flat or both)
- Nori punches
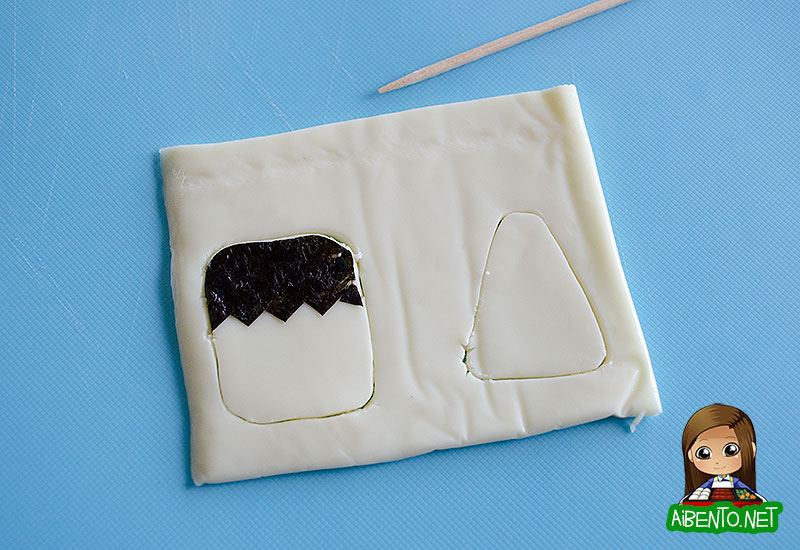
The punches I used were a Carla Craft one (which are thankfully available online now, yay!) and an older punch that’s a simple smiley face. Anyway, first you cut out Frankenstein’s hair. Don’t throw away that cheese slice wrapper, you’ll need it!
No need for a pattern, just cut a rectangle with rounded tops and then cut a jagged bottom. Stick his hair on top of the cheese slice.
I find that the pointed end toothpicks work best for cutting out cheese because you can twirl them. When you first start, you may end up breaking the cheese, as you can see on the candy corn bottom. Twirl it around to coat the end and lower the toothpick so that it’s cutting at an angle. You’ll see when you try it, eventually you figure out how to cut the cheese smoothly.
Cut around Frankie’s hair and then cut the rest of his head out as well. I just free-handed the candy corn, as it’s just a simple triangle with rounded corners. After you’re done, simply pull the cheese away. You should be able to use more of the cheese by making more characters to reduce waste.

Use your cheese slice wrapper as a little palette for your colors. You’ll need way less than a drop if you’re only going to make a few characters, so just a tiny one in each color will do. I mixed yellow and red for orange, going 2:1 yellow/red. Using a flat toothpick (I find it easier to paint this way) just smooth on a bit of coloring. Make sure there are no lines, using your fingertip to smooth it out if needed.
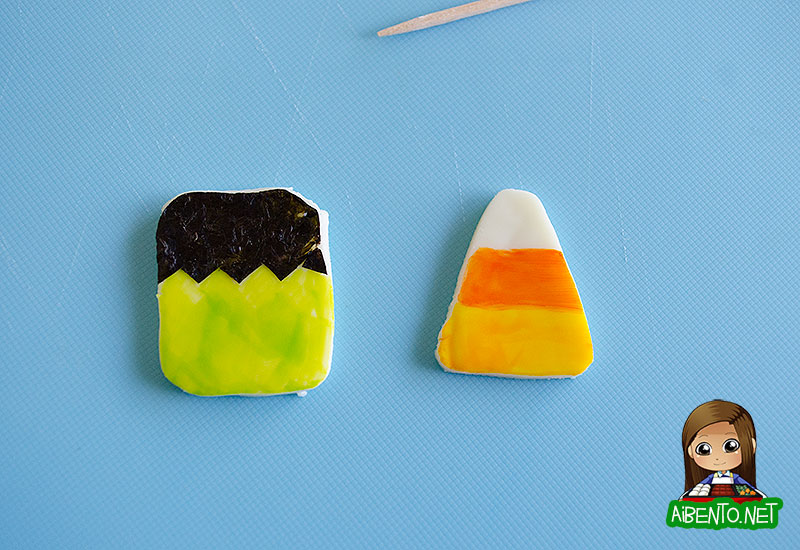
As you can see, you’ve got your painted cheeses, and now you just need to add the faces. I punched out little mini faces and used various pieces for different things. For Frankie’s stitches I just cut a really thin slice of nori and then cut one long one and three short ones.
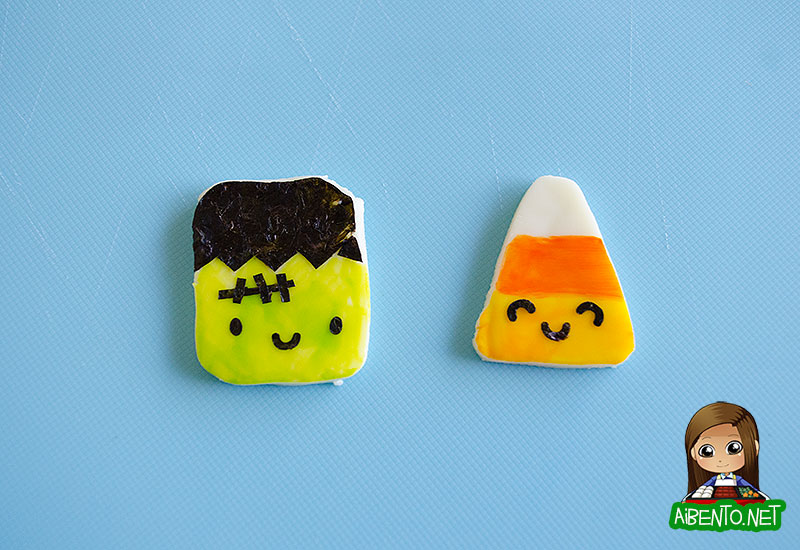
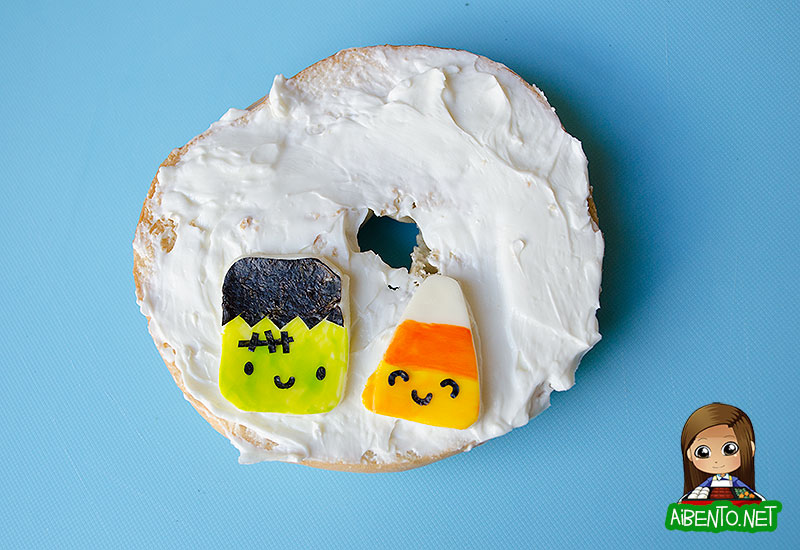
Putting his stitches on crooked look great, so don’t feel like you need to put them on perfectly straight. All done! I put these on a bagel to photograph, but I ended up saving them to offer to my kids for lunch tomorrow on a sandwich. Tonight I’ll try some other characters with my daughter and see what we come up with and post them in a Part 2. I have a feeling she’ll go crazy over Frankenstein! ^_^
Thanks for reading! Let me know if you try this!